One-Day Cold Ferment Pizza Dough

This one day cold ferment pizza dough delivers a tender chewy crust, deep flavor, and incredible browning in high heat.
This is my go-to pizza dough when I want deep, developed flavor without waiting two or three days. With a simple room-temperature boost, a thoughtful flour blend, and a low-yeast cold ferment, this dough gives you that pizzeria-style texture — light, airy, soft, and blistered — all in just one day.
If you’ve ever wanted an easy, reliable dough that tastes like it took much longer to make, this is the one!
Trials, Errors, and Finally… Great Pizza
My earliest attempt at pizza dough was back in high school. I remember pulling a recipe from an old cookbook we had at home, thinking, How hard could this be?
I was completely new to baking and even newer to anything involving yeast. I didn’t understand water temperature, fermentation, or why patience actually matters. And I was impatient — very impatient.
The dough never rose, the crust baked up dense, and my “pizza” came out looking (and tasting) like a hockey puck. That was my first lesson in baking: sometimes you need to slow down.
Years later, as an adult in my full baking era, I decided to revisit pizza. This time I came armed with a thermometer, a kitchen scale, and a genuine appreciation for accurate measurements. I tried a three-day cold ferment using all 00 pizza flour, and while the flavor was great, baking it in my regular oven left the crust soft rather than crisp and heat-spotted.
So I bought an Ooni Volt and tried again — and this time I swapped some of the 00 flour for bread flour to encourage a chewier bite. (I love a chewy crust.)
The results were fantastic, but the three-day timeline still felt a little too long, even for my more patient adult self.
Over the last few months, I’ve worked on refining and streamlining the process, and I think this version is the sweet spot. All the flavor you want, none of the unnecessary waiting.
Here’s the one-day dough that finally checks every box for me.
And if you’re needing a pizza sauce recipe, make sure you try out my Spicy Arrabbiata Sauce. It’s delicious and pairs wonderfully with this pizza dough!

A happy baker moment — nothing beats pulling a beautiful pizza out of the Ooni.
Why You’ll Love This Dough
One day, big flavor. The room-temp start develops complexity fast, so you get that long-ferment taste in a shorter timeline.
Perfect texture. Soft, stretchy, and easy to open into beautiful rounds.
Balanced chew. Bread flour adds strength, 00 flour keeps it tender, and a touch of whole wheat brings subtle nuttiness.
High-heat friendly. Ideal for the Ooni, but works in any oven with a steel or stone.
Beginner-friendly. Forgiving, predictable, and consistently delicious.
Expert Tips for Best Results
Keep the water cold. This prevents the dough from fermenting too quickly during the initial stage.
Don’t skip the 2–3 hour room-temp rest. This is where the magic happens — the dough builds flavor rapidly.
Oil your dough balls lightly. Keeps the surface hydrated and prevents a dry skin from forming.
Use a gentle touch when stretching. Let gravity do the work for a light, open crumb.
Bake hot. Around 850°F for Ooni-style results with beautiful leopard spotting.
Rotate frequently. Every 20–25 seconds for an even bake.
From toppings to leopard spots in under two minutes. Heaven.
Frequently Asked Questions
Can I leave the dough longer than one day?
Absolutely. This dough handles up to 72 hours in the fridge beautifully — the flavor gets even deeper and more complex.
If you plan to ferment it longer, shorten the room-temperature rest on day one to about 60–90 minutes instead of 2–3 hours.
This keeps the dough from becoming over-proofed before it even hits the fridge.
Do I have to use 00 flour?
No, but it creates that silky, tender texture characteristic of Neapolitan-style dough.
What does the whole wheat do?
Just 5% adds complexity, nuttiness, and a subtle earthy depth without making the dough heavy.
Is that small amount of yeast really enough?
Yes — the low yeast keeps fermentation controlled and prevents the dough from blowing out during the cold stage.
Make Ahead Options
Up to 3 days early: After balling, refrigerate for up to 72 hours. Just remember if you plan to cold ferment longer, shorten the room-temperature rest on day one!
Freeze the dough balls: Freeze up to 3 months. Thaw overnight in the fridge and give them 2 hours at room temp before stretching.
Par-bake option: If you want ready-to-go crusts for busy nights, avoid baking at high heat — the dough will balloon like a pita. Instead:
Preheat your Ooni or home oven to 500–550°F.
Stretch the dough and dock the center with a fork to prevent bubbling.
Bake for 2–3 minutes, just until the bottom is set and still pale.
Cool completely, wrap well, and freeze.
To use, top and bake normally at high heat.
Serving & Storage
Leftover Dough (Already Fully Fermented)
If you mixed a full batch and simply didn’t use all the dough balls, they’ll keep for an additional 24 hours in the fridge.
Keep them lightly oiled and covered to prevent drying.
Since this dough has already gone through the one-day workflow (including its room-temp rise), it continues fermenting in the fridge. After the extra 24 hours, it becomes softer, looser, and more delicate — still delicious, just more fragile.
To use leftover dough:
Let it sit at room temp for 45–90 minutes before stretching.
Handle gently — it will be more extensible and airy.
Planned Long Ferment (1–3 Days)
If you intend to ferment the dough for up to 72 hours, reduce the initial room-temperature rest on day one to 60–90 minutes instead of 2–3 hours.
This keeps the dough from over-proofing before it goes into the fridge.
Baked Pizza
Leftover slices keep 2–3 days in the fridge.
Reheat using any of these:
Skillet: Medium heat, 3–5 minutes for a super-crispy bottom.
Air Fryer: 350°F for 3–4 minutes — fast and reliable.
Oven: 375°F for 7–10 minutes — ideal for reheating multiple slices evenly.
Frozen Dough
Dough balls can be frozen for up to 3 months.
Thaw overnight in the fridge, then allow 2 hours at room temperature before stretching so the dough relaxes and becomes workable.
Ingredient Swaps & Variations
All 00 Flour
Using only 00 flour gives you a softer, silkier, more tender dough.
00 flour is very finely milled with lower protein, which means less gluten development and a more delicate bite — classic Neapolitan-style texture.All Bread Flour
Bread flour has a higher protein content, which creates stronger gluten networks.
This gives the crust a chewier, more structured, New York–style bite, especially noticeable around the rim.Swap Whole Wheat for Rye
Rye flour adds a deeper, earthy, slightly tangy flavor and increases the dough’s rustic character.
Even a small amount (3–5%) changes the aroma and gives the crust more personality.Add 1 tsp Honey
Honey adds a touch of sweetness and also helps with browning.
Because honey caramelizes faster than flour does, it encourages a golden, flavorful crust — especially helpful if baking in a home oven where the temperature is lower.Add Dried Herbs or Garlic Powder
A small amount of seasoning in the dough can completely change the vibe.
Great options include:Oregano (classic pizzeria aroma)
Basil (sweet, fragrant, softer than oregano)
Thyme (earthy and subtle)
Garlic powder (savory depth without overpowering)
Onion powder (rounds out flavor)
Italian seasoning blend (easy, balanced, and familiar)
A combination of oregano and garlic powder in the dough makes for a deliciously aromatic, classic pizzeria-style crust.
What You’ll Need (Tools + Ingredients I Recommend)
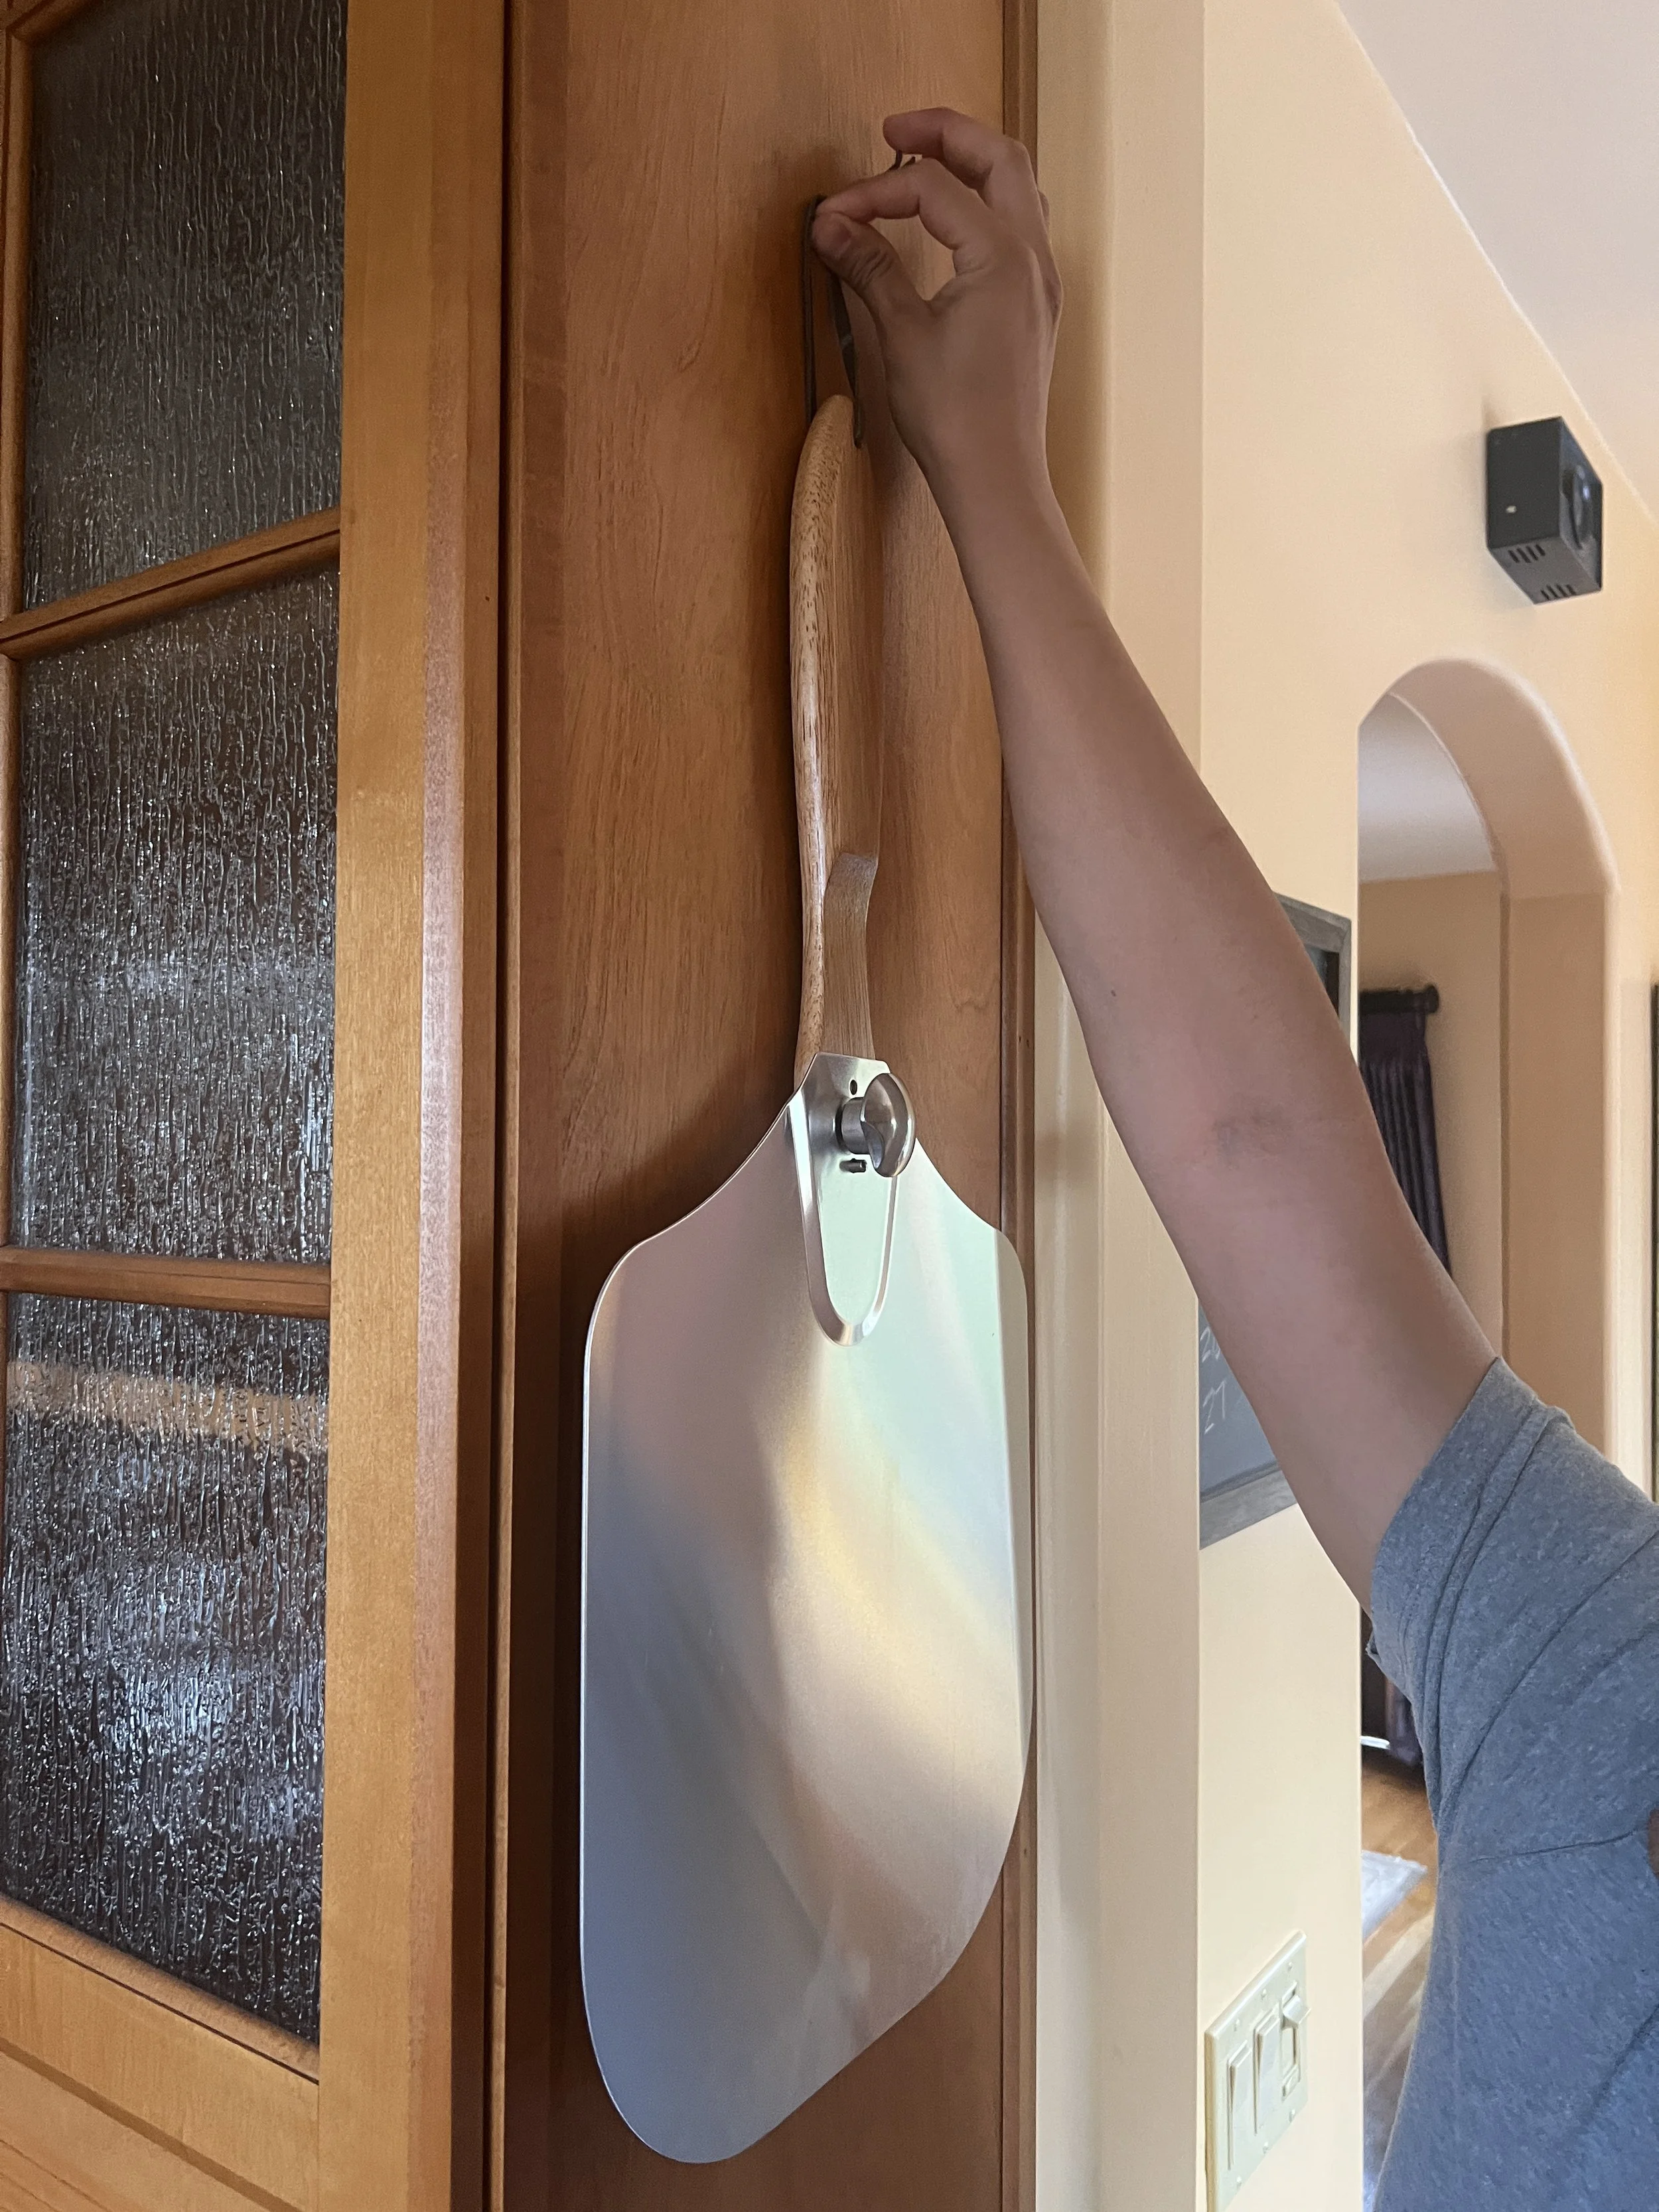
A good peel makes all the difference when launching into high heat.
These are the tools and ingredients I rely on every time I make this dough. If you want consistent, bakery-level results at home, these help a lot.
This post contains Amazon affiliate links. As an Amazon Associate, I earn a small commission from qualifying purchases at no extra cost to you.
Kitchen Scale: Accuracy is everything with pizza dough. I use the OXO Good Grips scale and genuinely love it for its precision and reliability.
Large Mixing Bowl: Choose one with enough space for the initial room-temperature ferment. A bigger bowl helps the dough relax and begin developing flavor.
Bench Scraper: Essential for cleanly dividing dough and shaping tight dough balls. The OXO metal scraper is great, but the inexpensive plastic ones work perfectly too.
Dough Boxes / Lidded Containers: These keep the dough balls hydrated, round, and easy to handle. I use a set I found on Amazon — a little pricey, but super sturdy and honestly makes me feel like a pro in my own kitchen.
Pizza Peel: I’ve learned that using two peels is a game changer: a wood peel for launching (the dough slides off beautifully), and a metal peel for pulling pizzas out of high heat safely and cleanly.
Ooni Pizza Oven: Ideal for those gorgeous leopard spots and fast bakes. My Ooni Volt was definitely a splurge, but it delivers consistent, restaurant-quality pizzas in under two minutes, and I have zero regrets. I have the first Ooni Volt and got it at a great price - but I hear the new version is pretty great too!
00 Flour: For tenderness, extensibility, and that silky Neapolitan feel. I stick with King Arthur.
Bread Flour: Adds structure, strength, and chew. King Arthur’s bread flour is my go-to (and Sam’s Club usually has it for a great price).
Semolina Flour: A light sprinkle on your peel helps the dough slide and adds a subtle crunch to the crust. Finding semolina can be hit-or-miss — Smart & Final didn’t have it, but Vons and Albertsons usually do. I also tried ordering the Caputo Rimacinata semolina from Amazon; the flour was fantastic, but it arrived in a soft envelope… flour everywhere.

Finely milled and low in protein, “00” flour helps create that smooth, extensible dough every pizza lover wants.
Ingredients
(For 3–4 × 12” pizzas)
285g bread flour
285g 00 pizza flour
30g whole wheat flour (5%)
390g cold water (65%)
12g salt (2%)
2g instant yeast (~½ tsp, 0.3%)
18g olive oil (optional, 3%)
Instructions
1. Mix
Combine all the flours, yeast, and salt in a bowl — the flour protects the yeast, so adding salt now is perfectly fine.
Pour in the cold water gradually while mixing until the dough comes together into a shaggy mass.
Add the olive oil last and mix until incorporated.
2. Knead
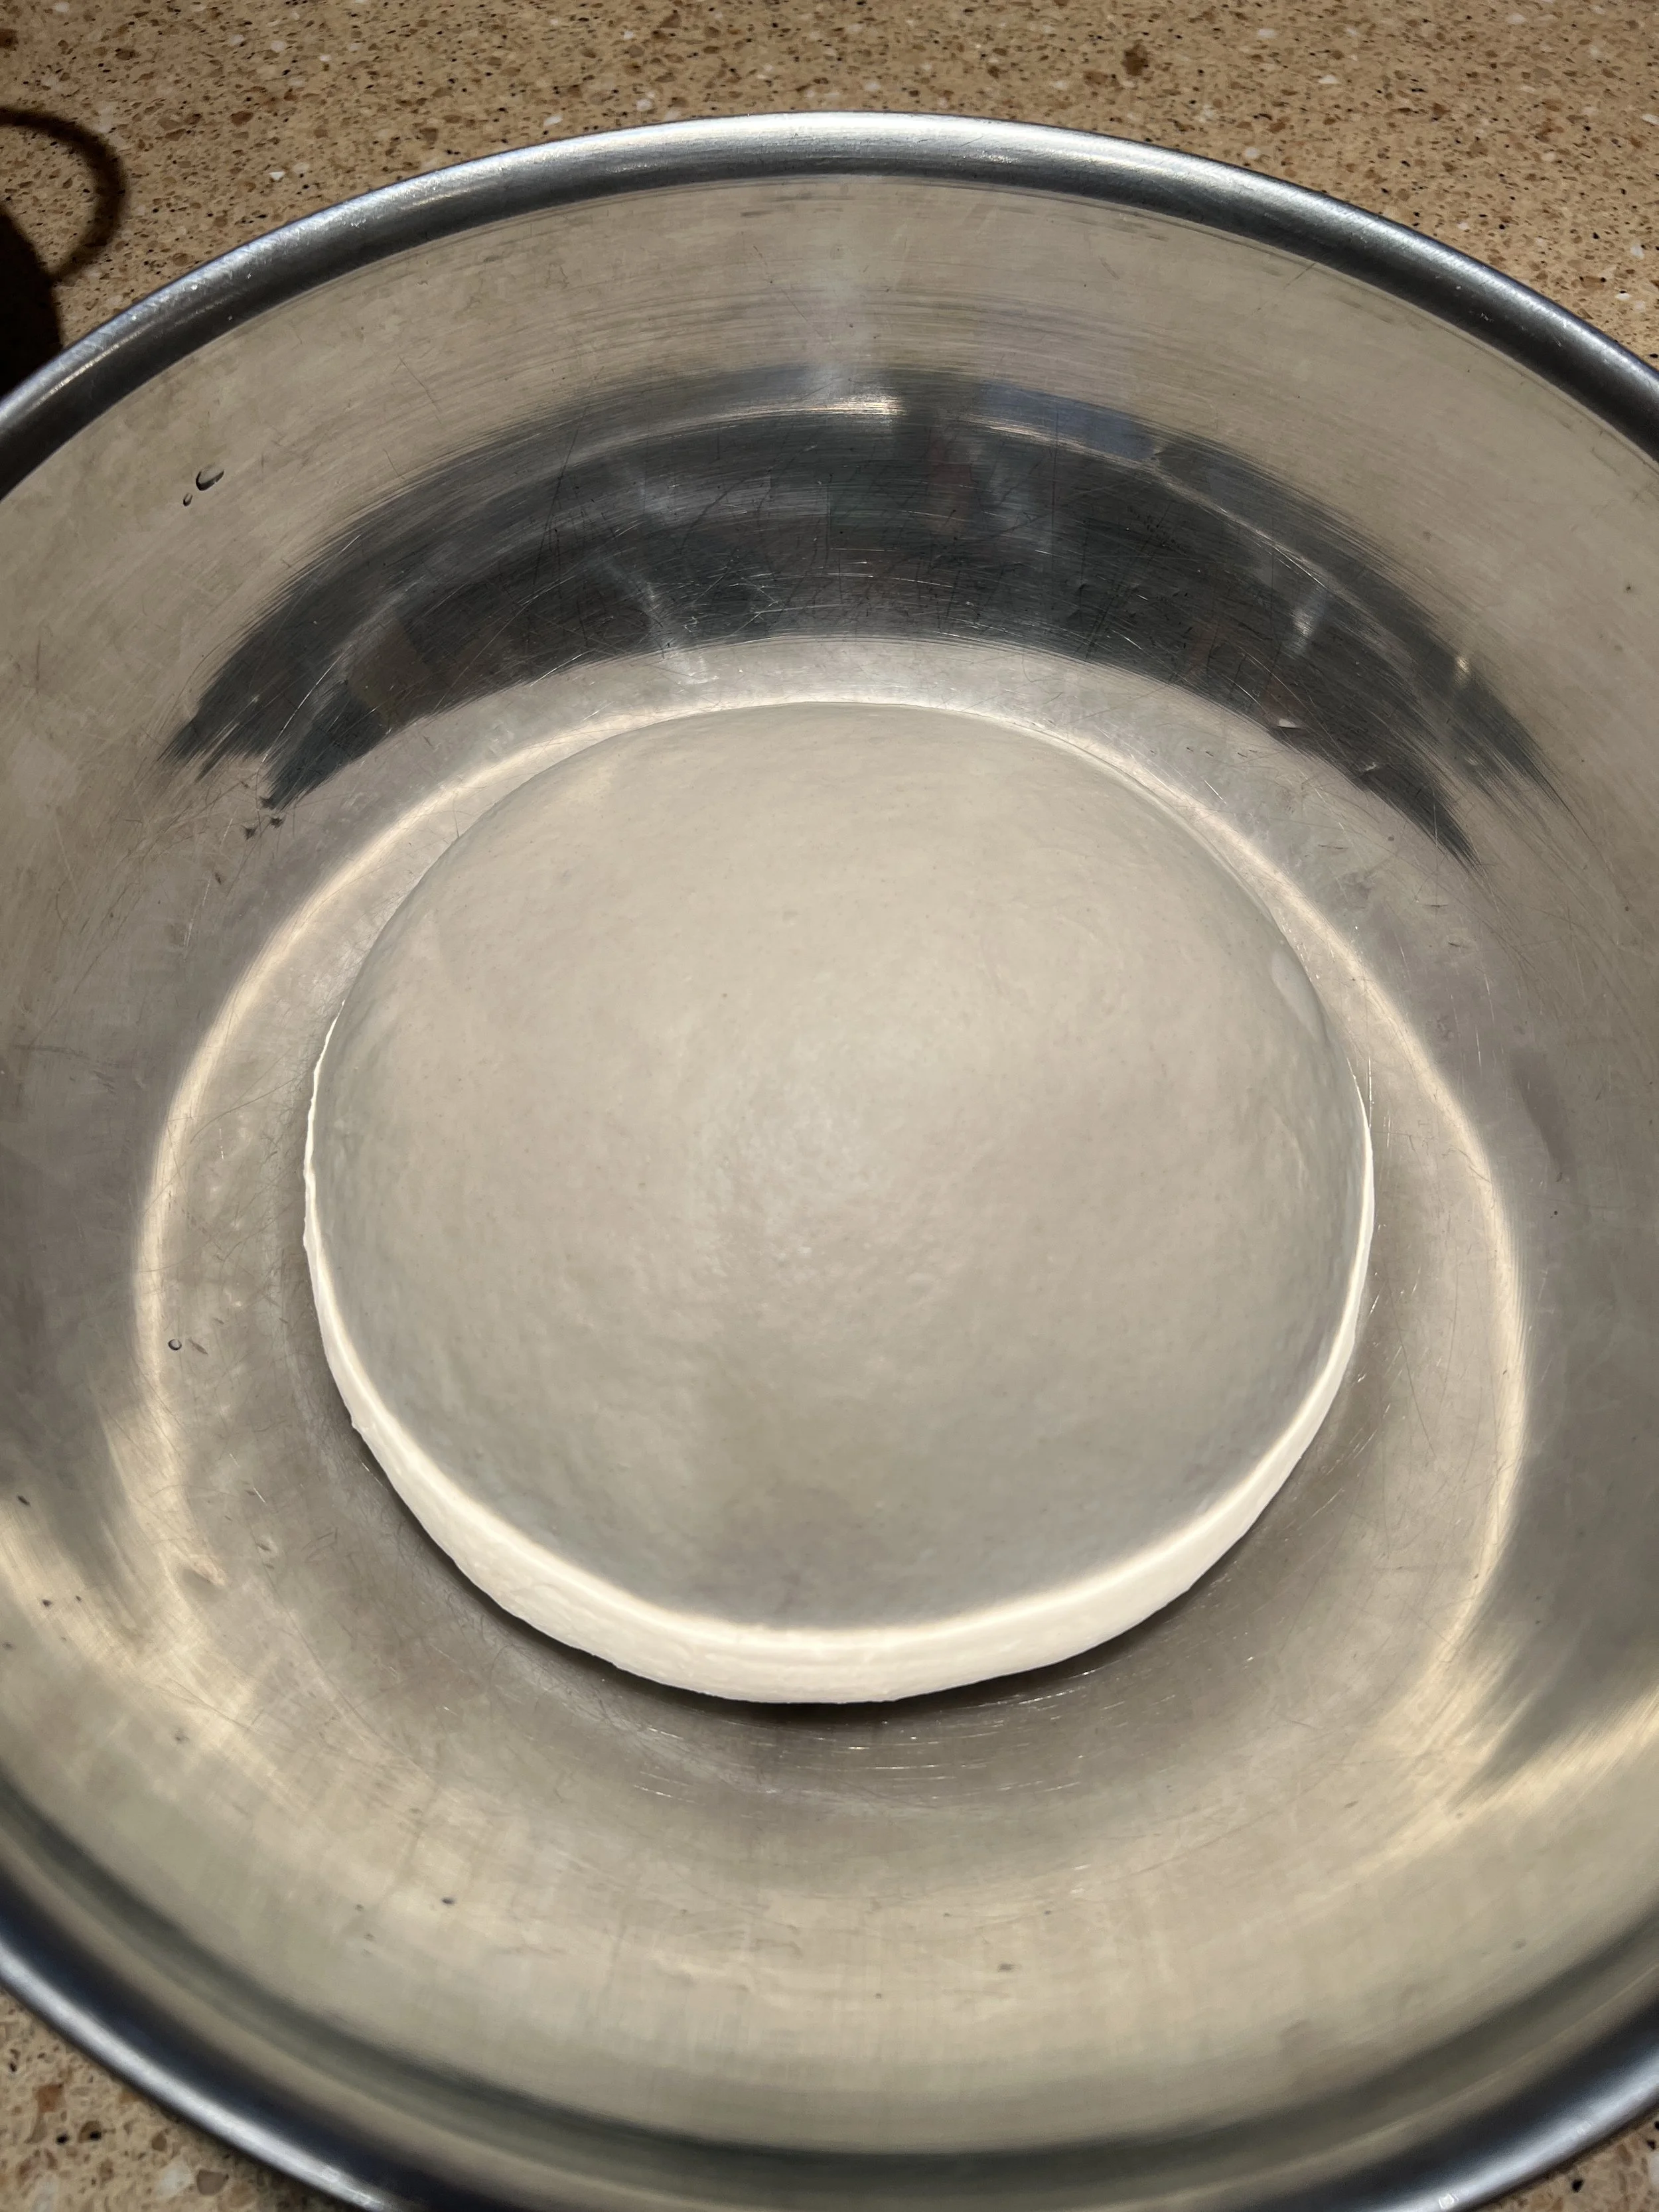
Soft, elastic, and smooth — exactly what you want your dough to look like at this stage.
Knead for 8–10 minutes by hand or 6–8 minutes in a stand mixer on low speed until the dough is smooth, elastic, and cohesive.
It should feel slightly tacky but not sticky, and it should stretch easily without tearing.
If you gently tug a piece of dough, it should show early signs of a windowpane — thin enough to let some light through without ripping immediately.
3. Room-Temperature Ferment Boost (2–3 hours)
Cover and let the dough rest at room temperature. This short room-temperature stage jumpstarts flavor development and kickstarts fermentation.
Note: If you plan to cold-ferment the dough for longer than one day, shorten this stage to prevent over-proofing.
For a 3-day cold ferment, reduce the room-temperature rest to 60–90 minutes instead of the full 2–3 hours.
4. Divide & Ball
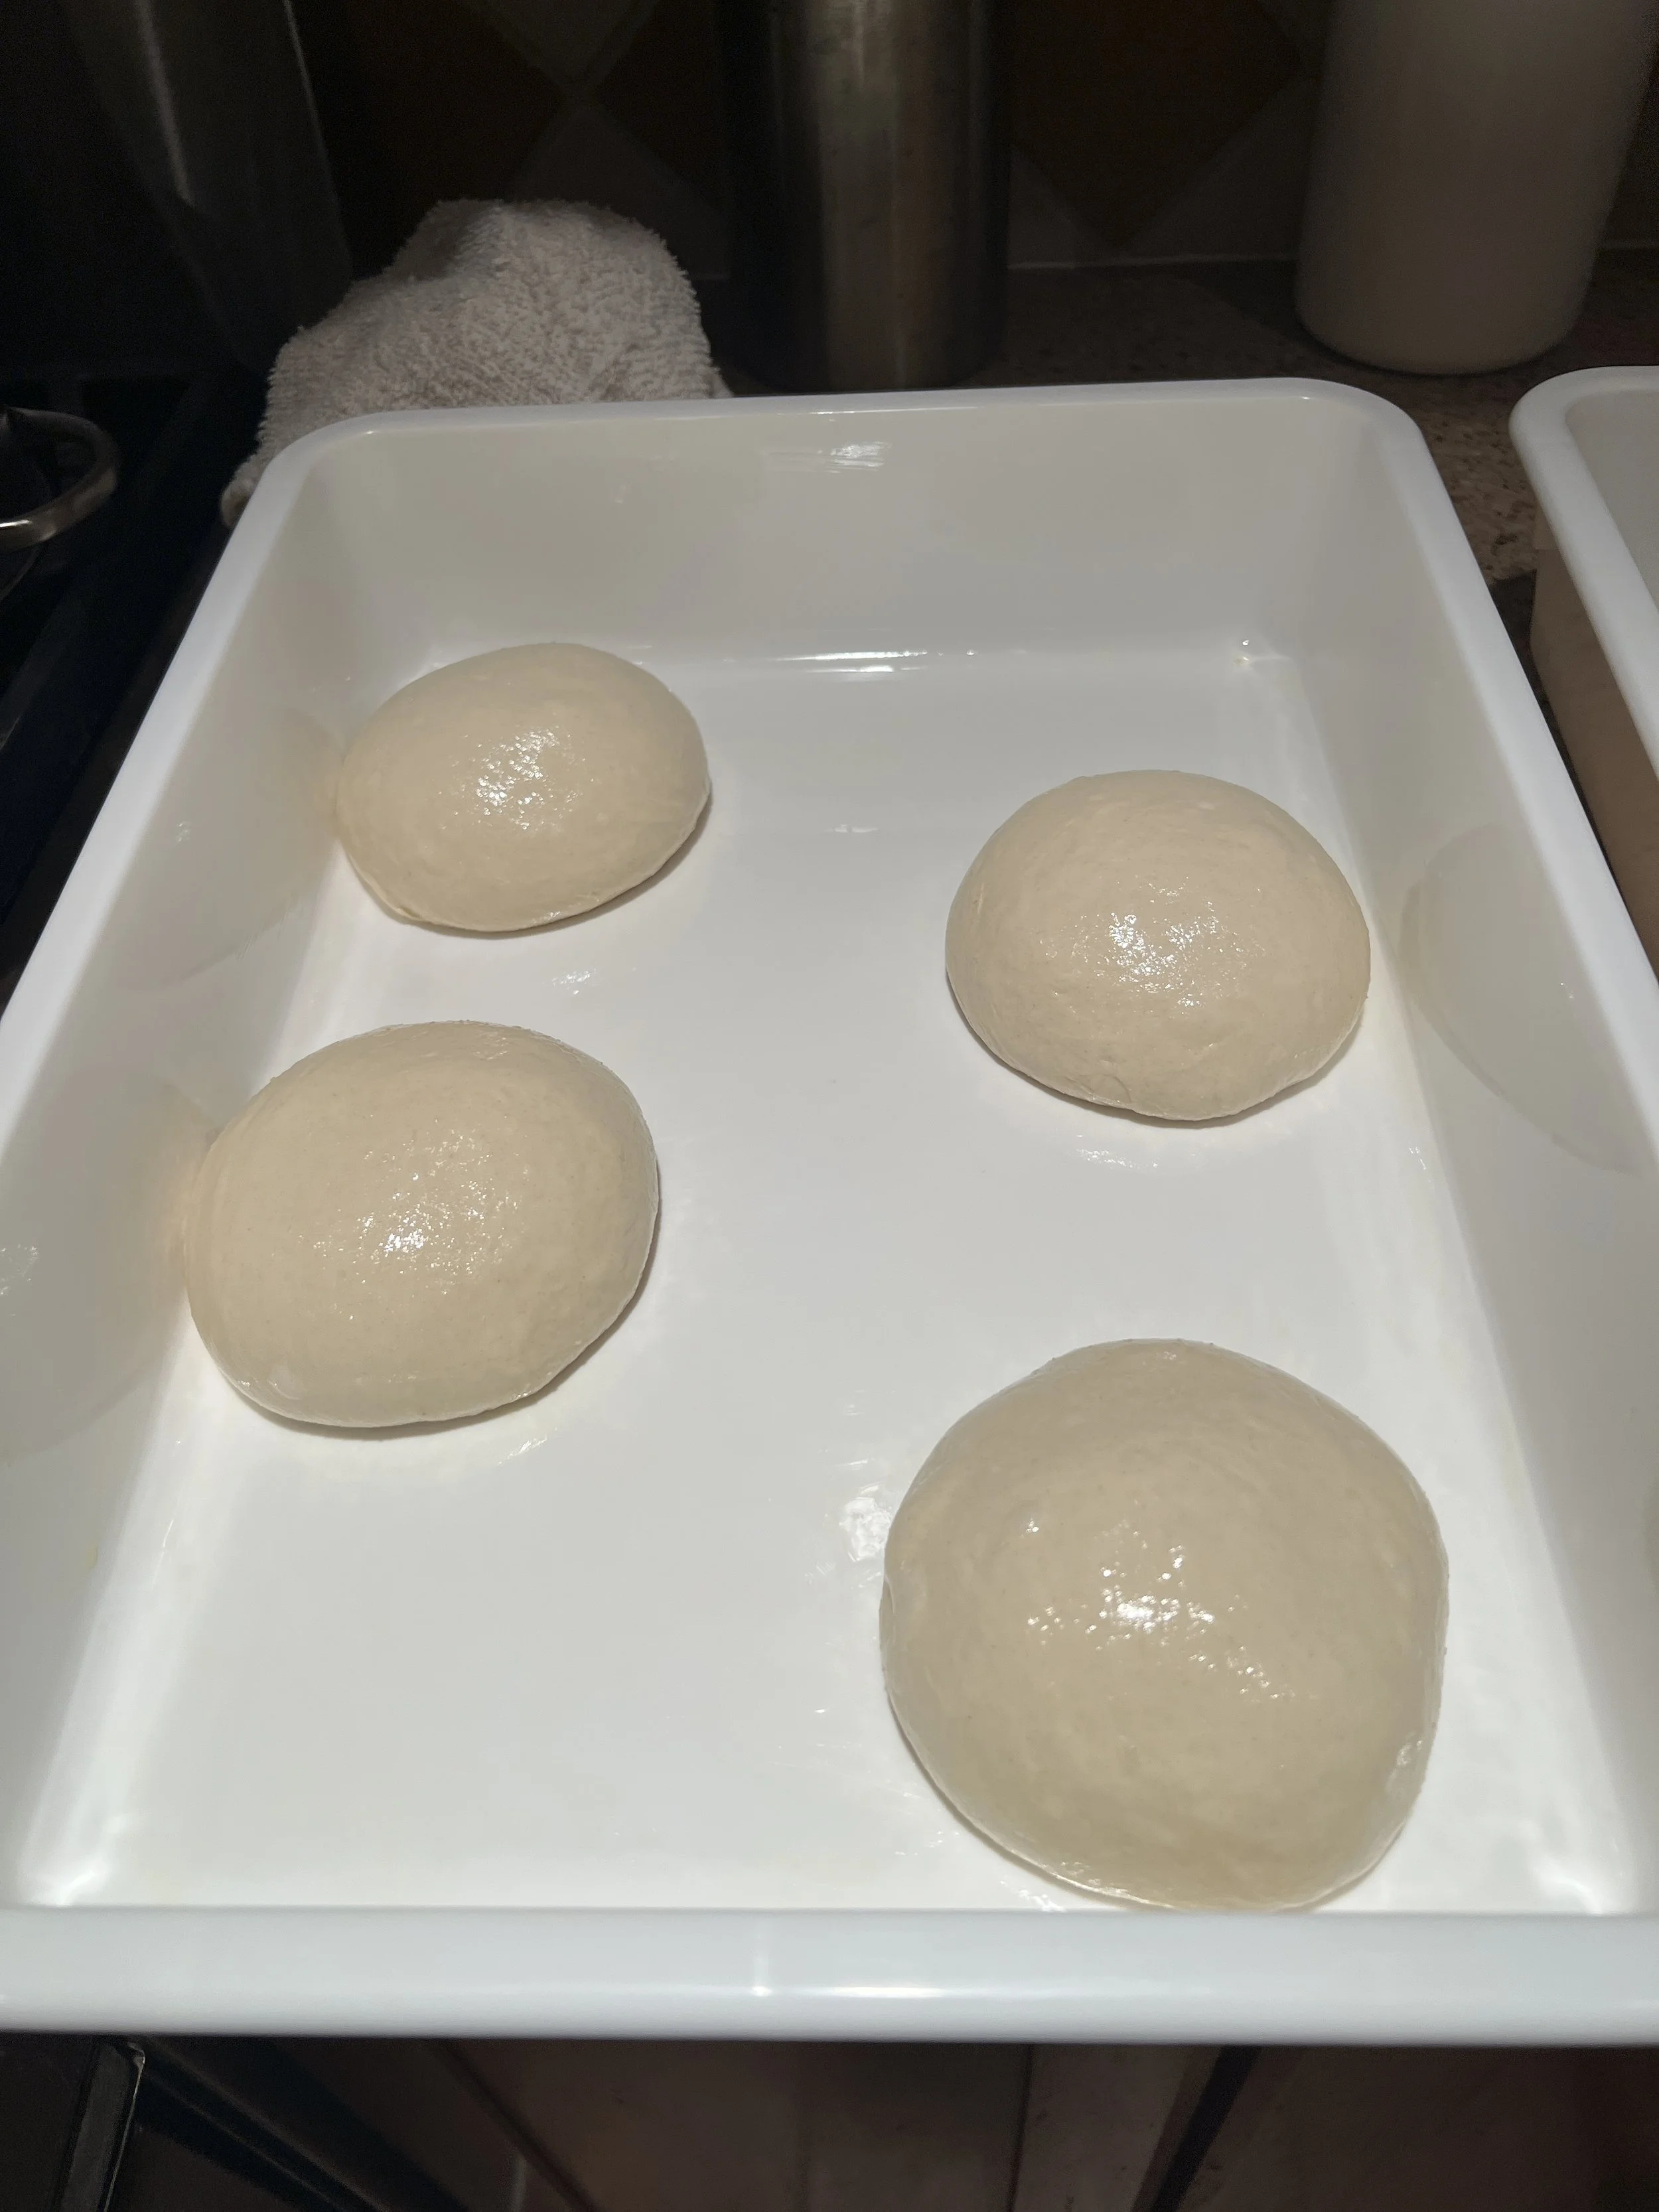
Ready for the chill — this is where the flavor starts to deepen.
Portion the dough into either:
3 × ~310g dough balls for thicker 12" pizzas, or
4 × ~233g dough balls for thinner 12" pizzas.
Use a bench scraper to cut clean portions, then shape each piece into a tight, smooth ball by tucking the edges underneath and rotating against the counter.
Lightly oil each dough ball and place it into individual containers or dough trays. Cover well to keep the surface from drying out.
5. Cold Ferment (Rest of the Day)
Place the dough balls into the fridge and let them cold-ferment for the rest of the day.
This slow, chilled fermentation is where most of the dough’s flavor develops — the yeast works gradually, the gluten relaxes, and the dough becomes airy, extensible, and easier to stretch later.
Keep the containers covered so the dough doesn’t dry out or form a skin.
6. Bake Day Prep
Remove the dough balls from the fridge after they’ve cold-fermented for at least 20 hours, then let them sit covered at room temperature for about 2 hours before you plan to stretch and bake.
This warm-up period relaxes the dough, makes it easier to open into rounds, and gives you better oven spring.
7. Stretch, Top, and Bake
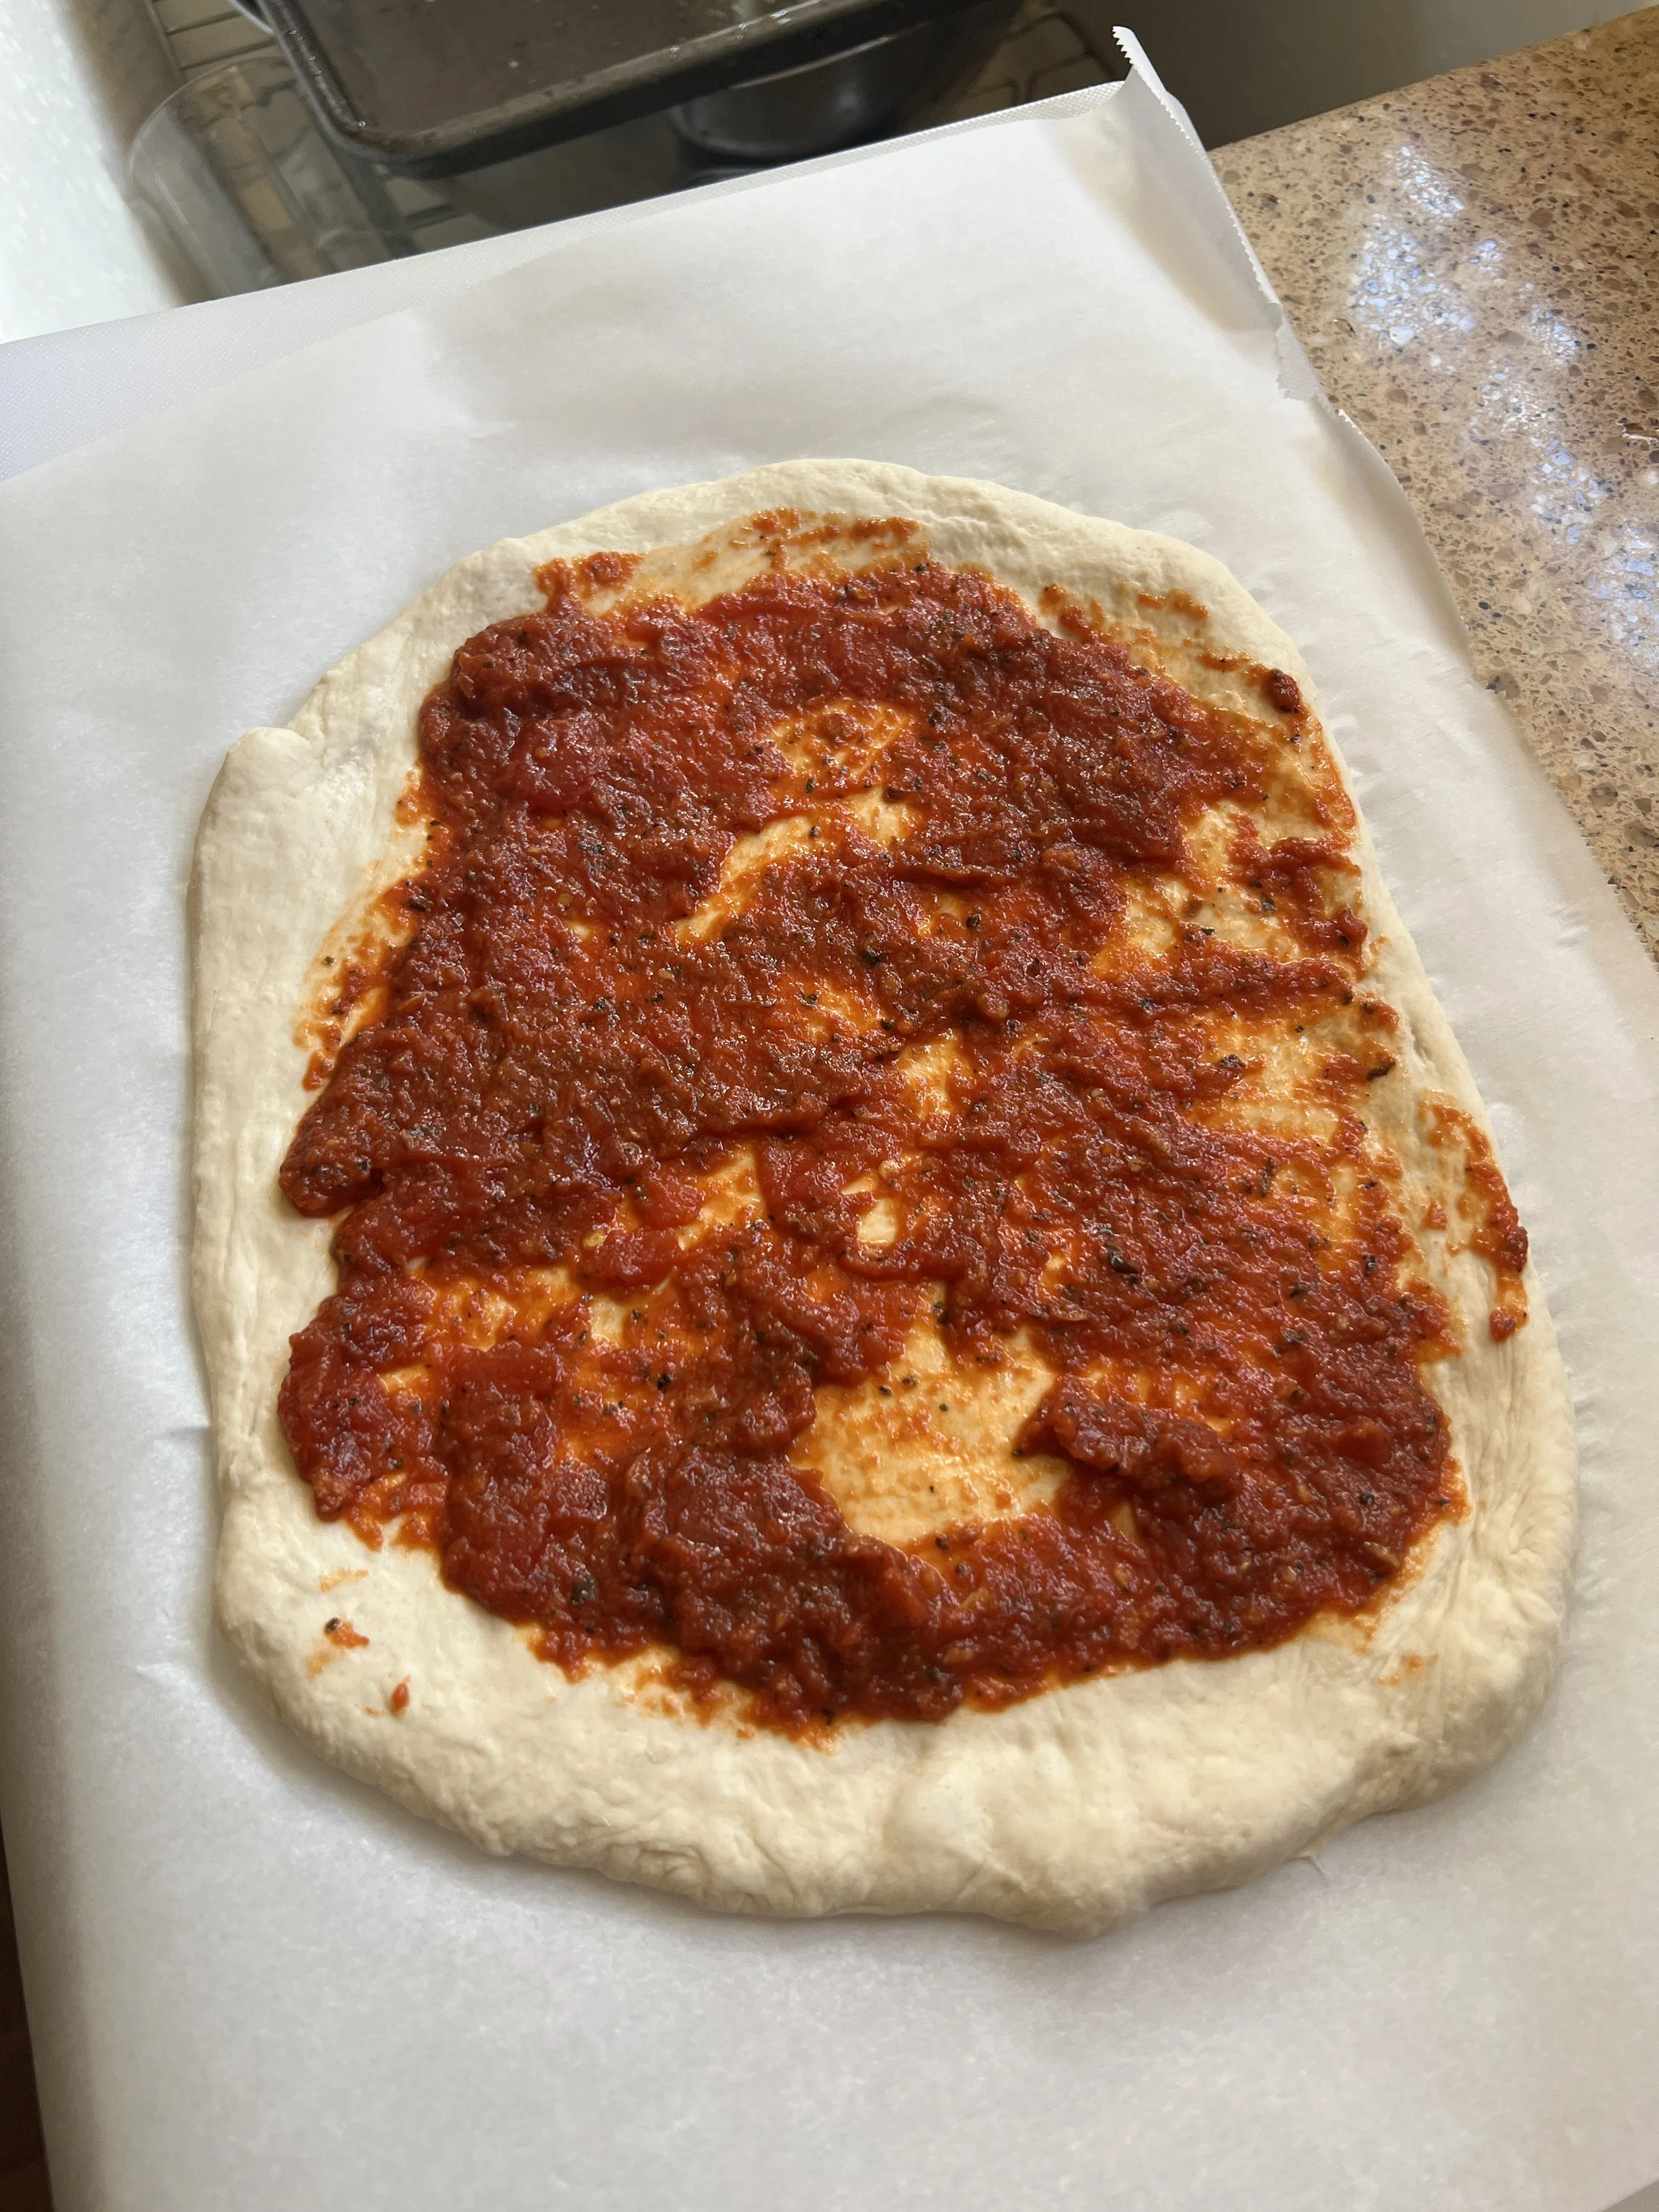
A light layer of sauce is all you need — it keeps the crust airy and helps it puff beautifully.
Gently stretch the dough into 12-inch rounds, letting gravity do most of the work. Transfer the stretched dough onto a wood peel dusted with semolina — the semolina acts like tiny ball bearings and helps the pizza slide cleanly into the oven.
Top lightly. With high-heat pizza, less is more: too much sauce, cheese, or toppings prevents the crust from cooking evenly and weighs down the airy rim.
Launch the pizza into your 850°F Ooni, then rotate every 20–25 seconds for an even bake. Use a metal peel to pull the pizza from the oven — it handles high heat better and slips under the crust cleanly once it’s set.
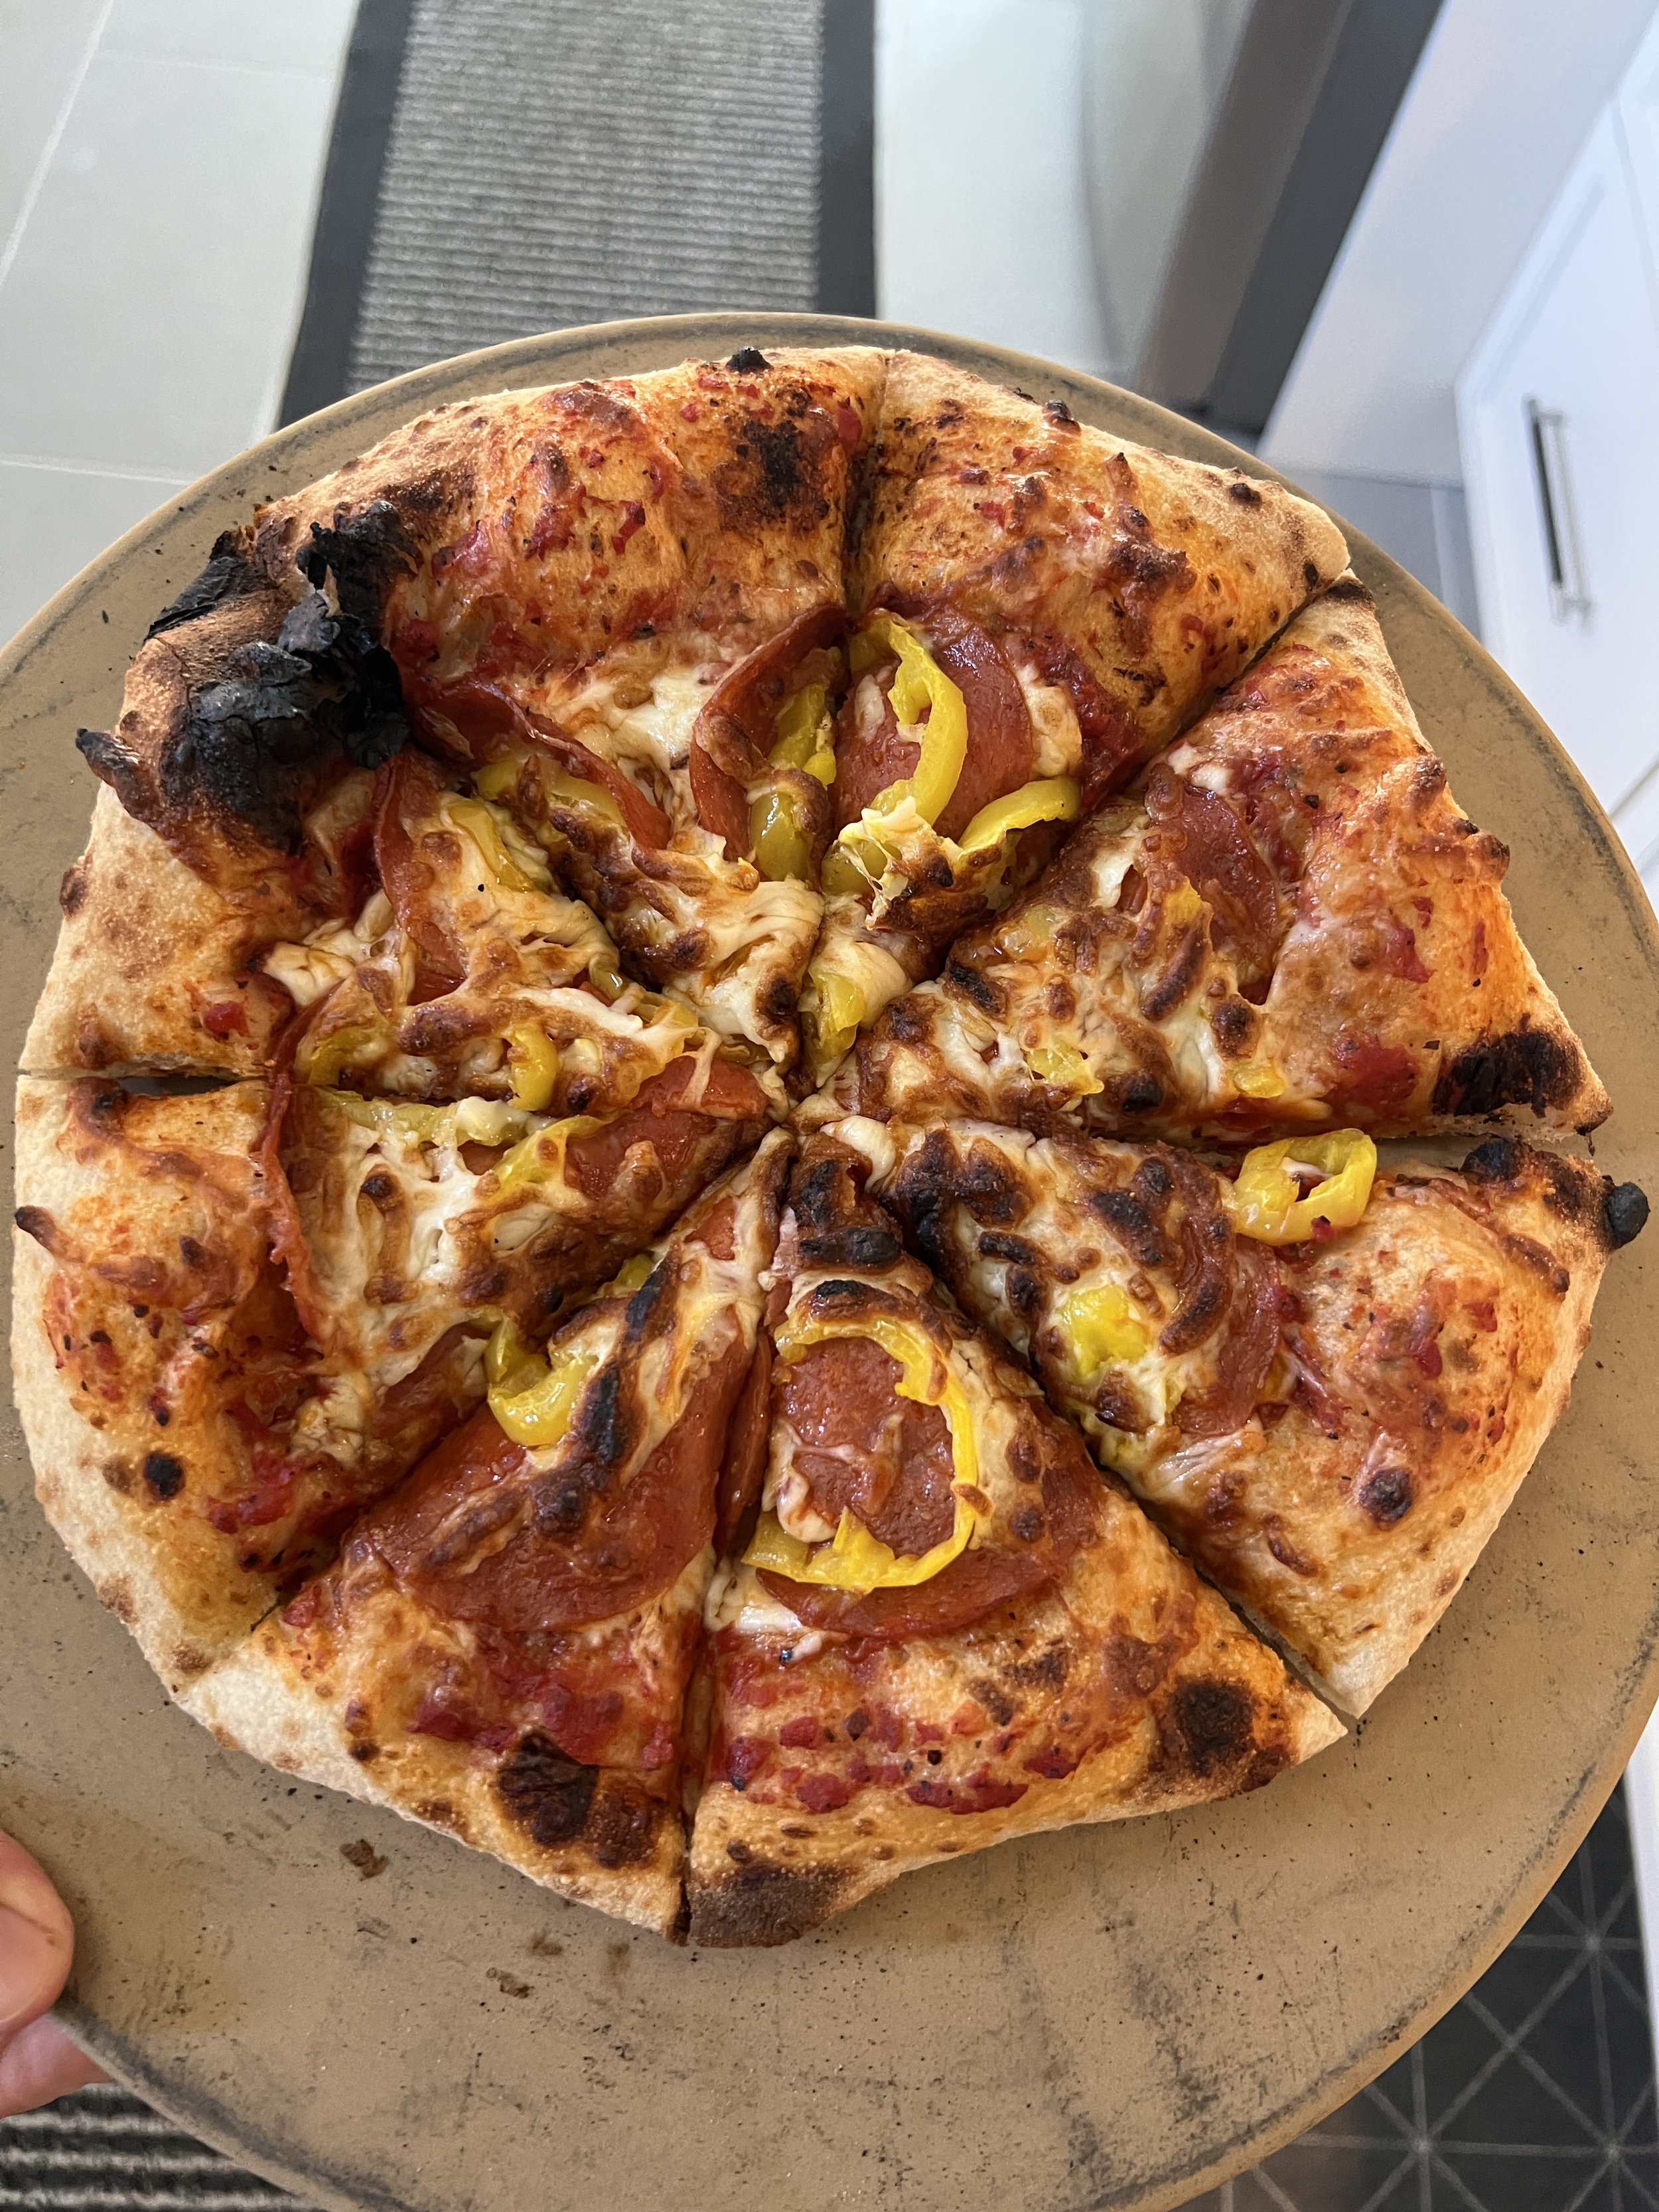
One of my favorite topping combos—pepperoni, banana peppers, and a crust that puffs up like a dream.
You’ll know the pizza is ready when:
The rim has deep golden blistering and small leopard spots
The bottom shows even, crisp browning
The cheese is melted and lightly bubbling
The center feels set but still tender
Total bake time is usually around 90 seconds, depending on your heat level, toppings, and dough hydration.
Hydration simply refers to how much water is in the dough. Higher-hydration doughs (like this one at 65%) bake quickly and develop beautiful blistering, while lower hydration doughs brown more slowly.
Result

A look at that airy, open crumb — quite an upgrade from my high-school hockey-puck pizzas.
What you’ll pull out of the oven is everything I wish my teenage self could have tasted instead of that unfortunate hockey-puck “pizza” I made in high school.
This dough bakes up light, airy, blistered, and deeply flavorful — the kind of crust that looks (and tastes) like it came from a professional pizzeria. The rim gets beautifully puffed with tiny leopard spots, the bottom crisps just enough without turning tough, and the interior stays soft, tender, and full of character.
Quite an improvement from my very first attempt — and proof that a little patience, good ingredients, and the right technique can work magic. This one-day dough really does check every box, and once you try it, I think you’ll feel the same.

One-Day Cold Ferment Pizza Dough
This is my go-to pizza dough when I want deep, developed flavor without waiting two or three days. With a simple room-temperature boost, a thoughtful flour blend, and a low-yeast cold ferment, this dough gives you that pizzeria-style texture — light, airy, soft, and blistered — all in just one day.
If you’ve ever wanted an easy, reliable dough that tastes like it took much longer to make, this is the one!
Ingredients
Instructions
- Mix. Combine all the flours, yeast, and salt in a bowl. Pour in the cold water gradually while mixing until the dough comes together into a shaggy mass.Add the olive oil last and mix until incorporated.
- Knead for 8–10 minutes by hand or 6–8 minutes in a stand mixer on low speed until the dough is smooth, elastic, and cohesive.
- Cover and let the dough rest at room temperature. Note: If you plan to cold-ferment the dough for longer than one day, shorten this stage to prevent over-proofing. For a 3-day cold ferment, reduce the room-temperature rest to 60–90 minutes instead of the full 2–3 hours.
- Portion the dough into either: 3 × ~310g dough balls for thicker 12" pizzas, or 4 × ~233g dough balls for thinner 12" pizzas.
- Place the dough balls into the fridge and let them cold-ferment for the rest of the day.
- Remove the dough balls from the fridge after they’ve cold-fermented for at least 20 hours, then let them sit covered at room temperature for about 2 hours before you plan to stretch and bake.
- Gently stretch the dough into 12-inch rounds, letting gravity do most of the work. Transfer the stretched dough onto a wood peel dusted with semolina.
- Launch the pizza into your 850°F Ooni, then rotate every 20–25 seconds for an even bake. Use a metal peel to pull the pizza from the oven.